Convert Bank Statements and Transaction Files
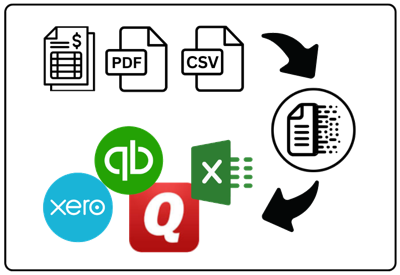
Extract transactions from PDF, CSV, QBO and other files on your computer and create files ready for QuickBooks, Quicken, Xero, Excel and more.
Need to import bank or credit card transactions but the format is not supported? ProperConvert runs on your computer. It reads transactions from PDF, Excel, CSV, and more, then creates files ready for QuickBooks, Quicken, Xero, Sage, Excel, and other software:
- extracts transactions from files incompatible with spreadsheet software PDF, QIF, OFX, QFX, QBO to CSV/Excel
- convert extracted transactions to a format compatible with your accounting software like Quickbooks, Quicken, Xero, Sage or others
How can the ProperConvert app help?
- Open files your software cannot read. Stop re-typing data you already have.
- Make transactions compatible with QuickBooks (PC/Mac/Online), Quicken, Xero, Excel/CSV, Sage (50/300/One), Wave Accounting, ZarMoney, MS Money, REACT, MYOB, NetSuite and others.
- Convert private data on your Windows PC or Mac without uploading it to the cloud.
- Used by accountants, CPAs, QuickBooks Pro Advisors, and bookkeepers (see reviews on the pricing page).
Extract transactions from incompatible formats
- Extract from PDF bank and credit card statements.
- Extract from CSV and Excel files.
- Extract from QBO, QFX, OFX downloads.
- Extract from exported QIF files.
- Extract from MT940 files.
- Downloaded from your online banking.
- Exported from your existing accounting software.
- Received from your clients (downloaded from their online banking or printed and scanned).
- Combine or keep multiple statements separate.
- Use renaming rules to adjust payee names or set expense/income accounts by payee.
- Auto-detects number and date formats in your file.
- Exclude or edit any transaction during conversion.
Create compatible files for your accounting software
- Convert to CSV/Excel.
- Convert to QBO (web connect) format for QuickBooks Desktop and QuickBooks Online.
- Convert to QFX or QIF format for Quicken.
- Convert to OFX format for Xero, FreeAgent, Wave Apps, NetSuite, and others.
Convert to formats ready for import into Quickbooks (Desktop and Online)
 Import into Quickbooks Desktop and Quickbooks Online using the QBO format. All QuickBooks Desktop versions also support the IIF format. For general journal entries, use QBJ or IIF format.
- When your bank does not support Quickbooks, convert to QBO format. Import it like a regular bank download using Bank Feeds and your renaming rules.
- When your Quickbooks version is too old for QBO, convert to IIF format. Import directly into the register using the converter's renaming features.
- Enter journal entries in Excel, convert to QBJ format, and import into Quickbooks with a full audit trail.
- Make incorrect transaction files from your bank importable into Quickbooks.
For QuickBooks Online, convert to OFX,QFX,QBO (web connect) formats or CSV format (set target as "Quickbooks Online").
Read more about Quickbooks formats
Make your files importable by Quicken
 Import into Quicken for Windows using QIF format. For Windows and macOS, use QFX (Web Connect). Keep using your Quicken version by converting to QIF format.
- Use the ProperConvert app for all required formats.
- Prepare checks to print in Excel and quickly convert and import into Quicken and print.
- Make incorrect bank or credit card transaction files importable into Quicken.
Read more about Quicken formats
Convert to formats compatible with Xero, Sage, Wave and others

 Many cloud apps import directly from bank accounts, but not every bank. Apps like Xero, FreeAgent, LessAccounting, MYOB, and Wave usually import OFX, QFX, or QBO files. Some also support CSV files.
Use the converter and make your file importable.
Read more about formats supported by accounting apps
Extract transactions into formats compatible with Excel, Google Sheets
Need to work with transactions in Excel, but the file cannot be opened by Excel? Use the ProperConvert app. It extracts transactions from the following formats:
- PDF to CSV
- QBO to CSV
- QFX to CSV
- OFX to CSV
- QIF to CSV
- MT940 to CSV
- Excel/CSV to CSV (reformat files for XERO or Quickbooks Online)
Export transactions to CSV, Excel (XLSX, XLS), copy to clipboard.
Conversion Options for Different File Types
The ProperConvert app converts bank and credit card transactions. Supported types include deposit, check, payment, credit card charge, credit card payment, and credit card refund. The exact types depend on your accounting software.
For bank and credit card transactions, the ProperConvert app converts from the following formats:
- CSV/XLS/XLSX/TXT (and copy/paste from any spreadsheet desktop or online software).
- PDF (downloaded from online banking, image based, protected, scanned).
- QFX/OFX/QBO.
- QIF/QMTF.
- MT940/STA.
The ProperConvert app converts into a file format compatible with your accounting or personal finance or spreadsheet software:
- QuickBooks Desktop (all versions), convert to QBO or IIF format.
- Quicken (convert to QFX, QIF, CSV Mint).
- Xero (convert to OFX, CSV).
- Sage (convert to OFX).
- Wave Accounting (convert to OFX).
- FreeAgent (convert to OFX).
- Banktivity (convert to QIF).
- Kashoo (convert to OFX).
- ZARMoney (convert to OFX).
- Excel, Numbers, Google Sheets (convert to CSV, Excel, clipboard).
- YNAB or You Need a Budget (convert to OFX, QFX, QBO, QIF, CSV).
- And many others that import OFX, QBO, QFX, or QIF files.
Both bank and credit card transactions are supported. Check which formats your accounting software imports and convert to the matching file type.
Types of Transactions to convert
The ProperConvert app converts bank and credit card transactions. Supported types include deposit, check, payment, credit card charge, credit card payment, and credit card refund.
Extract transactions from PDF statements
Credit card and bank statements are supported. Scanned, image based, encrypted and locked PDFs are supported (password is required for statements locked for viewing).
Convert CSV/Excel files with transactions
When your file comes from online banking, PayPal, Stripe, Square, or another source, you can map the columns. Splits are supported for QIF and IIF files. If your target format does not support splits, the converter breaks them into separate transactions.
Backup your accounting software company data file
Before importing any files, back up your company data file. QuickBooks and Quicken have quick backup options that take just a few seconds. A backup lets you undo any import that goes wrong. Back up before major changes too, like disabling online services.
QuickBooks Desktop (Pro, Premier, Accountant) has a Bank Feeds center. There you review imported transactions before adding them to the register. You can delete any that are wrong. Xero and QuickBooks Online have a similar review screen.
Frequently Asked Questions
How can I use ProperConvert to convert transactions?
- Backup your accounting software file
- Download, install and run the software
- Select a file with transactions and review transactions
- Click Convert to convert to a format your accounting software imports
- Import created file into accounting software
If I need any help with conversion, can you help me?
- Free support is available before and after the purchase
- All licenses include a Premium support period after purchase
- The Personal and Team licenses include ongoing support for conversions
Can I try before purchasing?
- Yes. ProperConvert is free to download and try.
- The trial converts up to 10 transactions per file. This is for testing only.
- You can review all transactions before converting.
- You can create a valid import file (limited to 10 transactions).
Can I try without limits?
- Yes. Order a monthly subscription to try without limits. We offer a 14-day money-back guarantee.
- To switch to another plan, buy the license you need and let us know. We will credit what you already paid for the monthly subscription.
About ProperSoft Inc.
Company
 ProperSoft is a small software company based in Ontario, Canada. We have been building transaction converters since 2008.
When you contact ProperSoft, you reach me, the developer (Sergiy), directly. I either help you solve the issue or fix the software.
Email and Online Support
- For any questions regarding ProperSoft products, please contact support@propersoft.net or use the support form on the Customer page.
Address, Phone
- General communication:
Located in Whitby, ON, Canada
Phone: +1 (877) 330-1268 (voicemail only, please email for faster support) Connect on LinkedIn