Convert CSV files to OFX and import into Quickbooks Online, Xero, Microsoft Money
If you have CSV or Excel file with transactions and your accounting software imports only OFX, or it imports CSV and OFX, but does not import your CSV/Excel, you may need to convert your file to the OFX file as better import option.
Try ProperConvert (CSV2OFX) app. It converts CSV/Excel files to OFX format.
Convert transaction files from CSV to OFX format
- ProperConvert (CSV2OFX) extracts transactions from CSV/XLS/XLSX files. It creates OFX files ready to import into Xero, Sage One or other OFX importing software or online service.
- No data entry: convert data you already have in bank or credit card transactions file format to the OFX format
- Smart: ProperConvert (CSV2OFX) understands many layouts. It finds columns like date, amount, description, etc. of your transactions.
- Easy to use: Converting your banking transactions into OFX files could not be any easier. In a few clicks, you will have all your transactions converted to importable by Xero, Sage One or other OFX importing software or online service format in no time at all.
- Free trial and support: try it for Free before you buy and receive full support before and after you order.
- Safe to use: ProperConvert (CSV2OFX) converts all your banking transactions on your computer.
How To Use CSV2OFX
This tutorial shows how to use CSV2OFX utility. IMPORTANT: CSV2OFX is now replaced with the ProperConvert app, which converts from more formats and converts to more formats.
Step by step instruction
Once downloaded and installed, start CSV2OFX. Read the welcome message that provides the main points about the conversion process.
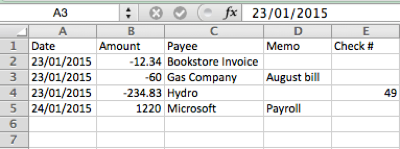
Select a file with transactions that you would like to convert. It could be CSV or Excel file bank or credit card statement downloaded from online banking.
Review transactions before converting, make sure dates are correct, expenses are negative, and payments to the account are positive.
Set the Account ID and Account Type. The Account ID must be digits only. You can enter the actual account number or credit card number, or a shortened number. It is important to use the same number when you convert multiple files for the same account and use a different number, when you start converting for another account.
For example, let's start with the first file for a checking account. Convert the first file and use account id as 10000001. Then you convert a second file for the same checking account, keep the same Account ID 10000001.
Then you start with a credit card account. For the first file for the credit card account, change the Account ID to another number, for example, 10000002. For the second file for this credit card account, keep the Account ID as 10000002.
When you start working with another account, make sure to adjust the Account Type as well.
The Currency can be adjusted and specific accounting software may require the Currency match as well as Bank ID and Branch ID.
The OFX target is important to set matching your accounting/finance software, as the converter will create the OFX file version compatible with your software.
There are some other settings that discussed in another video, we would skip these for now as you need them only in specific situations and you know when you need to change these settings.
Set the “Open after save” checkbox if you would like the software installed on your computer to open the created OFX file. If you have MS Money installed, it would be MS Money to open this OFX file.
Click the 'Convert' button.
And confirm the filename and the file location.
To import the created OFX file manually in MS Money:
- Click File, Import, Downloaded Statement.
- Select the created OFX file. Click the 'Import' button.
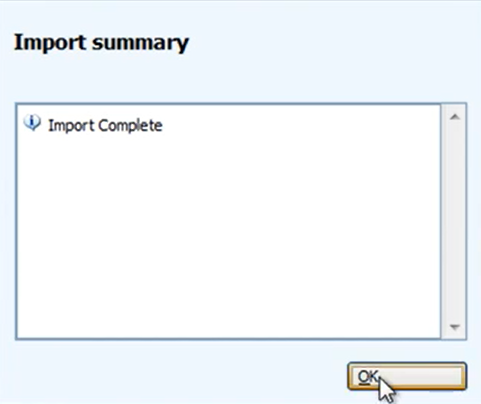
- Import complete.
- Review transactions.
Import created OFX file into Quickbooks Online
Now the OFX file is created, let's switch to Quickbooks Online and import created OFX file:
- Look for 'Banking' and click on it.
- Select the account you want to import your data into.
- Click the 'File Upload' button. In your accounting software, look for 'Import a statement', 'Upload a bank file', or similar links to upload created OFX file.
- Click the 'Browse' button and select the created OFX file. And click 'Next'.
- Then select an account in Quickbooks to import and click 'Next'.
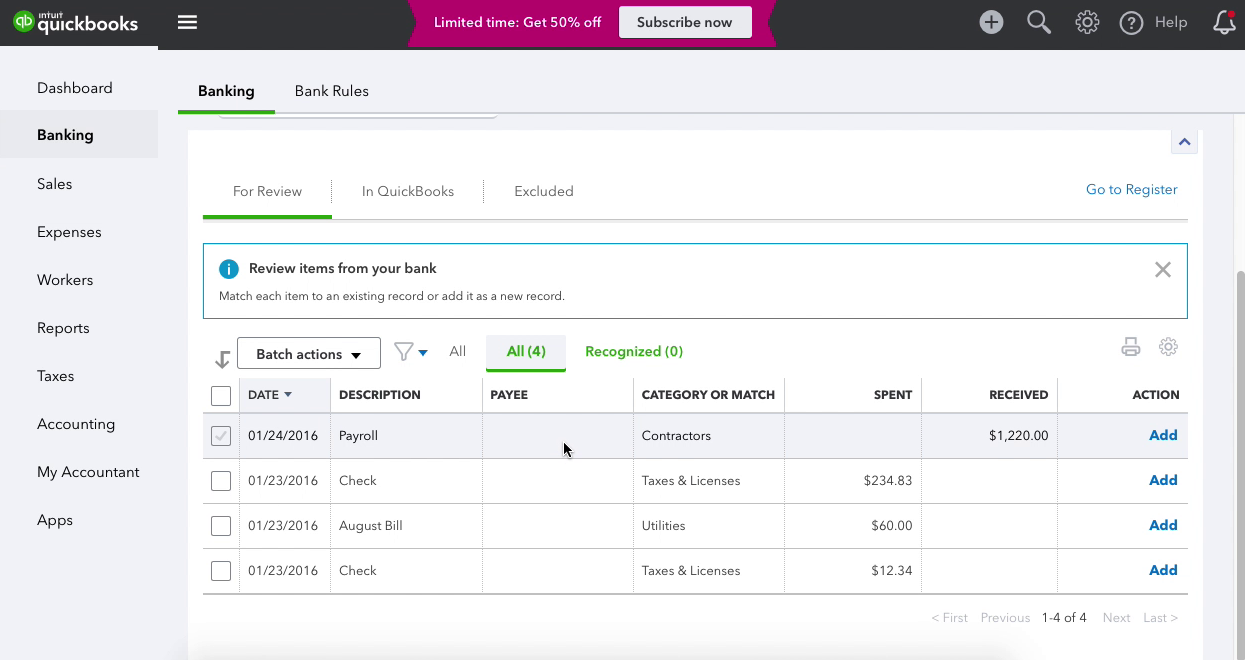
Once the transactions are imported, you can review, categorize them under the account and add them to the register.
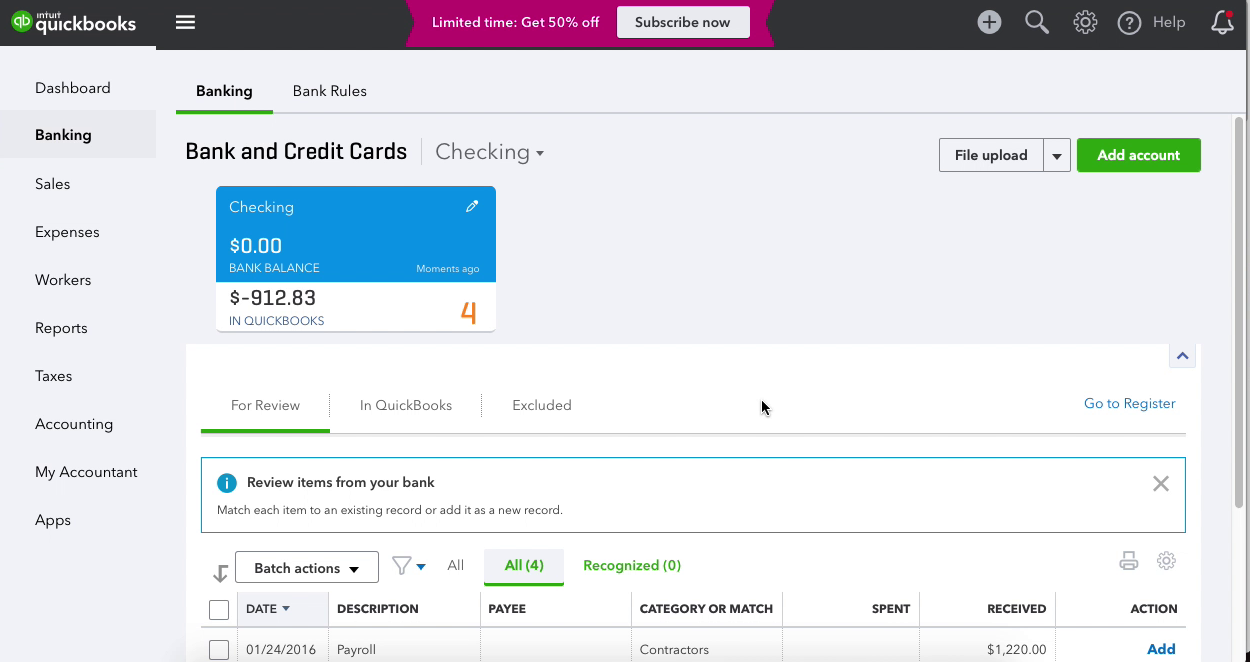
The Payee name did not assign because this is Vendor Record that you have to select in Quickbooks. This is not an actual Payee from the OFX file.
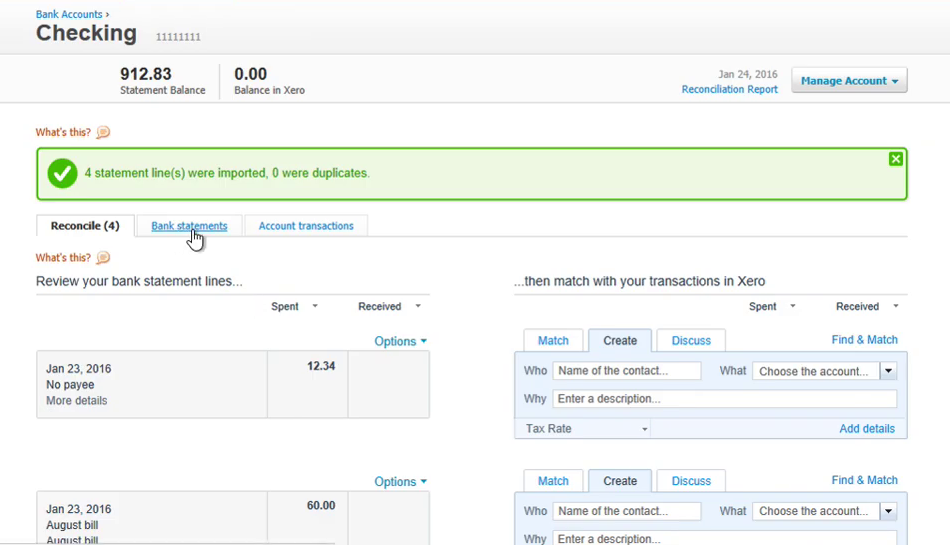
Import created OFX file into Xero
- Click on 'Manage Account' and look for the link 'Import a Statement'.
- Click the 'Browse' button and select the OFX file.
- Click the 'Import' button.
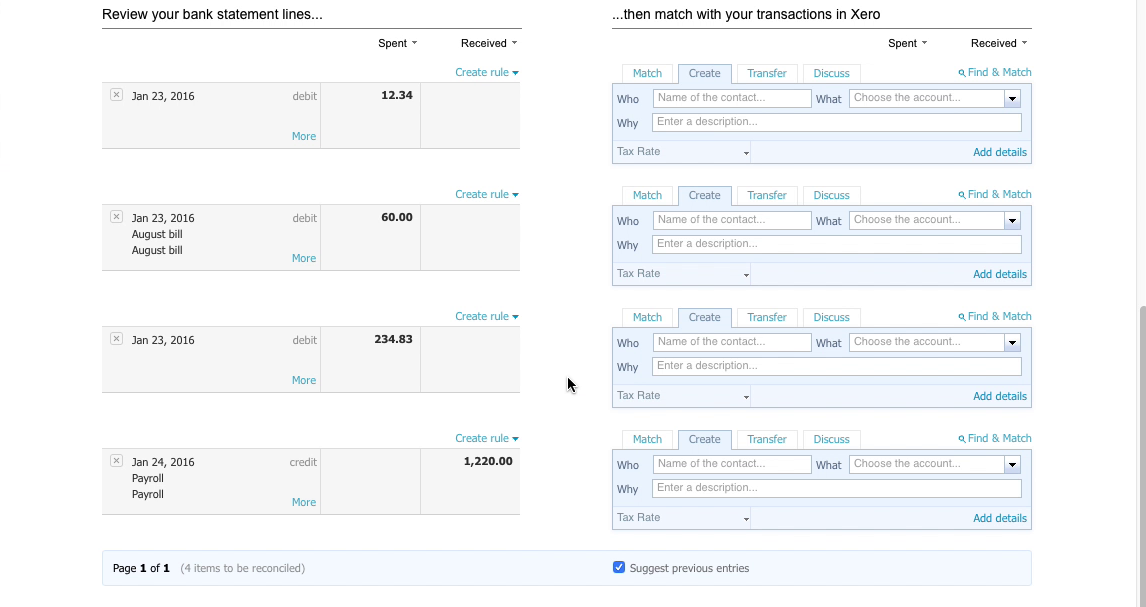
- Once the transactions are imported, you can review, categorize them under the account.
Related articles
- OFX2QFX: Convert OFX to QFX and import into Quicken Classic
- Convert QFX to CSV/Excel
- Convert CSV/Excel to IIF and import into QuickBooks
- Convert PDF to CSV/Excel
- Convert QFX files to QIF and import into Quicken (QFX2QIF)
- Convert QIF files to CSV/Excel (QIF2CSV)
- Convert PDF to OFX and import into Xero, QB Online, Sage One, YNAB, AccountEdge