Convert CSV/Excel to QIF and import into Quicken, Banktivity, MYOB
Need to import bank or credit card transactions in a CSV/Excel/XLSX/XLS file into Quicken or another app like Banktivity, but cannot seem to make it work?
The Solution: try ProperConvert app. It can convert your transactions into a format from CSV to QIF that Quicken, Banktivity, MYOB can import.
Convert transaction CSV files to QIF format
- Extract transactions from CSV/Excel/XSLX/XLS files. Convert transactions to QIF format compatible with your accounting or personal finance software
- Review transactions before converting, apply custom mappings to get right columns from CSV/Excel files
- Easy to use: select your app from the list to have a QIF file created to be compatible with your accounting software.
- Free trial and support: try it for Free before you buy and receive full support before and after you order.
- Convert all your banking transactions on your computer without uploading your or your client data and worry about privacy issues
How To Convert a CSV File to the QIF Format and Import Into Quicken and Banktivity
The example below shows how to convert a CSV or Excel file to QIF format. First we need to prepare CSV file. You can use our sample CSV file, open it in Excel or any other software and modify it.
Summary of the steps shown in the video:
Convert CSV to QIF
- Start ProperConvert app and select a CSV file
- The most important part is that the first line must have column names like date, amount, payee, memo, check number, category and each line should represent one transaction.
- Review Transactions and apply a custom mapping if automatic mapping requires an adjustment
- Set the Output type as QIF, set the account type and the QIF target, some apps like Quicken 2005-2017 do required account name exactly as you have in Quicken
- Set account type the QIF target which is Quicken for Windows.
- The output date format is can be adjusted depending on selected QIF target
- Click the Convert button, confirm the file name and we have the file created.
IMPORTANT: Review transactions before converting. Check that dates are correct, have the correct year (Date), amount, withdrawals, and deposits are shown in corresponding columns, check number (Doc/Check#) is assigned. Reassign columns to QIF fields if needed.
Expenses must be negative and payments to the account must be positive. Your credit card file may have expenses positive. Adjust CSV Mapping if needed. Click 'Charges/Withdrawals' are positive if expenses are positive on the CSV file.
Supported QIF targets:
- Quicken Classic Windows 2018+
- Quicken for Windows 2017
- Quicken 2005-2017 for Windows
- Banktivity
- Microsoft Money
- NetSuite
- MYOB
- Reckon
- YNAB
- Quicken 2007 for Mac
- Quicken UK
- AccountEdge
- Other apps (you may need to set expected date format)
Import Created QIF file into Quicken
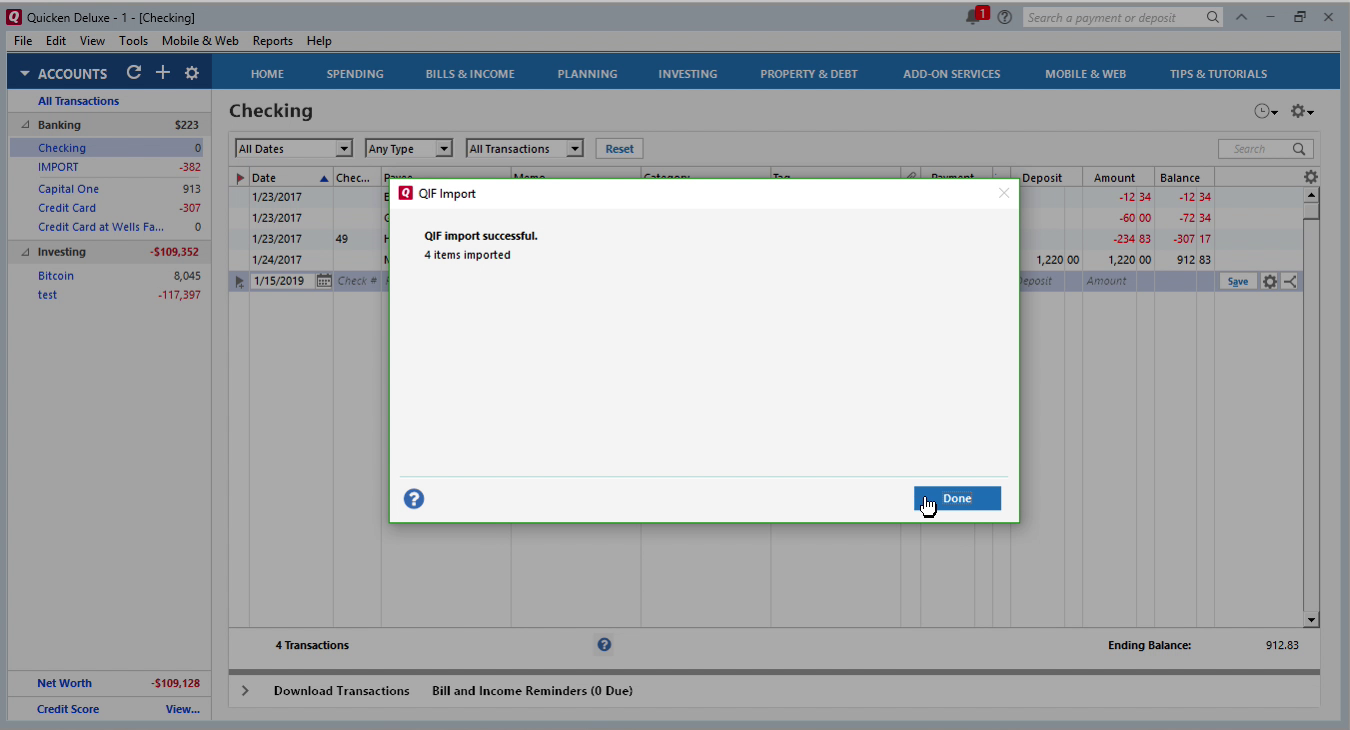
With the QIF file created, switch to Quicken and follow these steps:
- Backup your Quicken data file
- Click file, file import, QIF
- Click Browse, and select created QIF file
- Select an account from the drop-down list
- Click Import.
- Review Imported transactions.

Import created QIF file into Banktivity
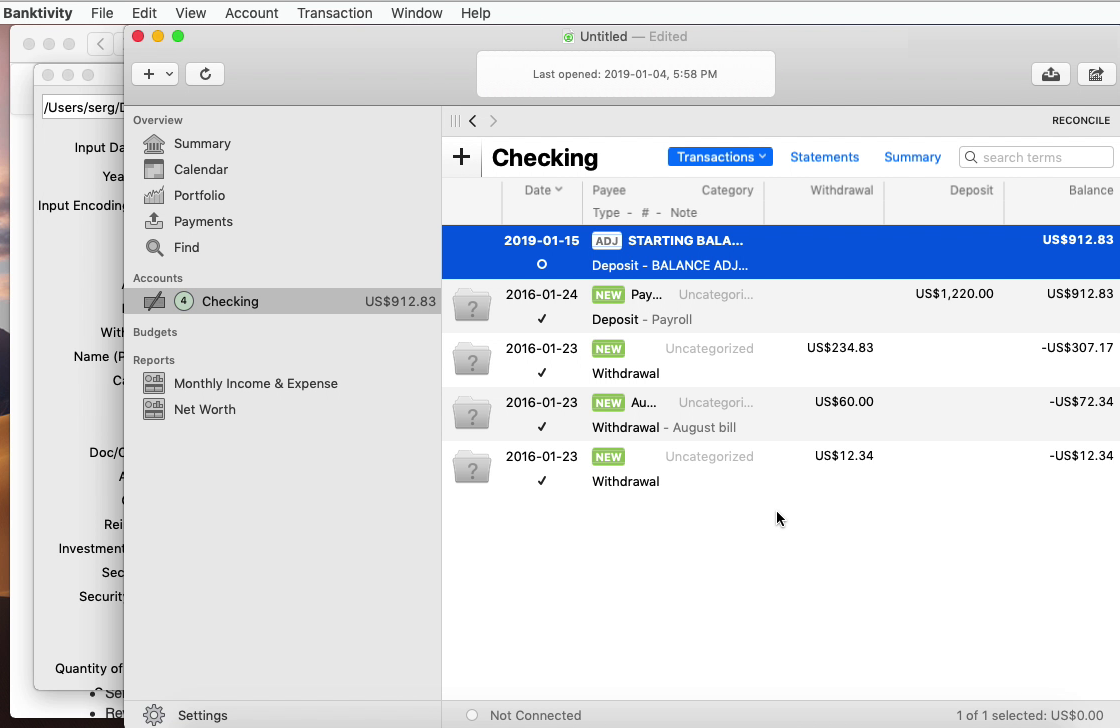
Eith the QIF file is created, let's switch to Banktivity and import created QIF file:
- Backup your Banktivity data file
- Select 'File' - 'Import transactions' undewr the main menu
- Select 'Import File' and select created QIF file.
- Select a Quicken account to import and click the 'Continue' button.
- Now your data is imported. Review transactions after import.

Related articles
- Convert PDF to QFX and import into Quicken Classic
- Convert PDF to QIF and import into Quicken Classic, Banktivity, YNAB, MYOB
- How to import a QFX file into Quicken for Windows and Mac
- How to convert to Quicken compatible formats (QIF, QFX, CSV Mint)
- How to Convert CSV to QFX Quickly and Easily
- Convert QIF to QFX and import into Quicken Classic